Up next in 10

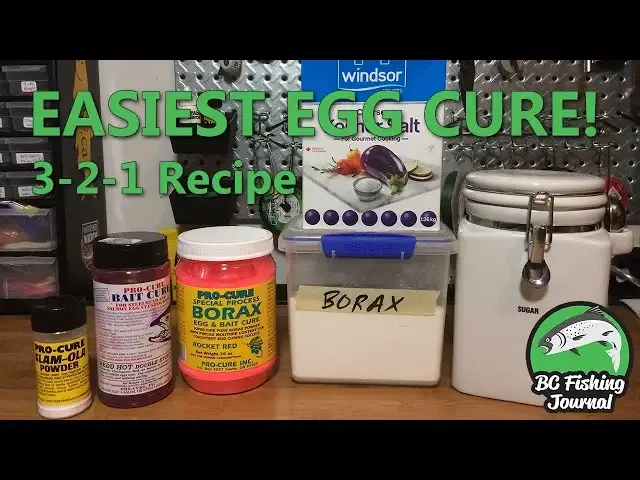
How to Cure Salmon Eggs with Borax, Sugar & Salt (3-2-1 Recipe)
May 8, 2024

This video outlines an easy Salmon Egg cure with ingredients from your local grocery store. Additionally, I mention my favorite additional scents/oils to use and how I like to store/freeze my eggs after they are cured.
3-2-1 Cure recipe: https://www.bcfishingjournal.com/project/how-to-cure-salmon-eggs-with-borax-sugar-salt
Show More Show Less View Video Transcript
0:00
Hey guys, welcome to another BC Fishing Journal video
0:05
Glad you could be here. I appreciate you. Today I really want to try the 3-2-1 cure
0:12
The reason being because it's very easy. You can do it with pretty much stuff you can buy at the grocery store
0:16
So that's been around for a while. It was made popular by a book by Scott Hagan
0:22
It's actually this one called Egg Cures. You've probably seen it before. It's called 3-2-1. Additionally, a couple of things I'm going to add a little bit later on is this Slammo
0:31
Love this stuff. This stuff has been a game changer for me
0:35
Honestly, I add this to almost every cure now just because I love it so much
0:39
Stay tuned. Really curious to see how it turns out. Alright, here we go
0:44
So this is going to be the first version of the 3-2-1 cure
0:50
So I'm just going to use one cup of borax and I'm going to use two-thirds of a cup of
0:56
sugar and one-third of a cup of kosher salt. So again, that's that 3-2-1
1:02
I think you get the idea. Alright, number one cure done
1:51
Alright, we've got our two cures
2:21
Now, let's get the eggs ready. As you can see, I've got a bit of a working table here
2:25
I just put some newspaper down and some paper towel and then I'm going to put the row on there
2:30
So I'm just going to get the row. And also, before I touch the row, I like to use the pickled latex gloves
2:37
So I've got a little something different than I typically do. Usually I cure my own eggs, but this time it's January
2:44
I don't have... I've already cured the eggs, the salmon eggs that I caught in this past fall and I don't
2:49
have any eggs left. So what I did is I actually went and bought some from Rob's Baits in Richmond
2:57
And here, this is some chum row. It's about a pound and a half. So it's like a $20 bag
3:01
So it's pretty pricey and I'm curious to see how the quality is going to turn out
3:05
These are eggs from the Fraser River. And yeah, so we'll give it a try
3:13
Okay, it looks a pretty decent row. There is blood in there, as you can see
3:20
There's that blood line there. That's going to need to be flushed out
3:24
So I'm going to do that first and foremost. That's one skein
3:33
That's a big one. Smells pretty good. Alright, it's decent. It's still got a really good skein on there
3:42
You can tell like the skein is really solid and tight. I like that
3:46
That's a really nice chunk actually. That's really nice. This one's got a little bit of a blood line, but that's okay
3:52
As you've probably seen, I've done this in the past. If you don't bleed out your fish well, you're going to get those blood lines in there
3:59
And so, yeah, you definitely don't want to have that. So what we're going to do is I'm going to work the blood out
4:04
I can use just like a dull knife or a spoon and it should come down
4:09
Yeah, I can see it moving already. Perfect. Yeah
4:38
And then here's just our original one that we already pre-mixed up. We know that we mixed it up
4:43
And make sure to lightly sprinkle it all. Get in there. Kind of coats it all
5:02
Put some on the back too, along the skeins. Let that go for a little bit
5:19
Here's that one. A Red Rocket. Same thing, three to one. Except we got the Red Rocket Borax and not the standard plain Borax
5:49
I'm going to toss that in here. Toss over there
6:01
Like that. And because I've cut the skew a little bit, I'm going to add a little bit more coat here
6:17
A little of our mix. Just going to add a little bit more as you can see
6:23
Not a lot, just a dusting because I'm going to shake them around in there
6:42
And take these off now. Come back. It's only been five minutes and you can already see the juices are already starting to come
6:52
It's starting to come right out of the eggs there. So what I'm going to do is I'm going to put these in for 24 hours in my refrigerator
7:02
And I'm going to tumble them, you know, or whenever I think of it. Just to go in there, I'll just tumble them a little bit
7:07
But they're going to stay in the fridge for 24 hours. And so after that 24 hour period, that's when you can begin to add the extra scents and stuff like that
7:16
Okay, here we are 24 hours later. We have the Red Rocket right here
7:21
And then just the typical 3-2-1 cure there. And you can see there, the juices have come out
7:26
I didn't put too much though, there's not a ton of juices. Like, see the eggs have been soaking up pretty good
7:31
But you can see there, some juices here. This is like more of a natural thing here
7:37
Doesn't look as good on that one. But now that it's been 24 hours, the key thing to do now is you can add two things
7:45
Color and scent. So you can do that other bit with something I'm going to put in both of these is the Pro-Cure Slamo
7:53
That's a really, really great little powder to add in there. You could also add liquid dyes
7:59
This would also be a really good time if you wanted to put some color in something like a Kool-Aid flavor
8:04
Like cherry or something like that. Just for coloring. Strictly for coloring
8:09
And so you could add that now. So after the 24 hour period, we could start to do that
8:13
So what I'm going to do is I'm going to add some Slamo powder. And then I'm going to put these back into the fridge
8:18
And just let them continue to finalize curing for the next probably 24 to 48 hours
8:27
Again, this is the powder here. Slamo Pro-Cure. You can see, it's kind of a spoonful there
8:43
That's quite a bit. If you were using Kool-Aid or things like that to color the eggs
9:00
again, that coloring goes a long way so you don't need much. It's just enough to get the color that you're looking for
9:07
Really what you're adding is just sugar, right? So it's just the coloring and sugar
9:12
So I would just say, add as you see fit. Good to go
9:26
So last time I talked to you, it was a 24, kind of the initial curing process that was 24 hours
9:32
This is two more days after that. So this has been a total of 72 hours for this cure
9:38
And you can see that the eggs are looking quite nice. And they've soaked up most of the juice
9:43
There's actually not any excess juice in this one. So I didn't put too much cure, as you can tell
9:48
If there is a little extra juice in the bottom, totally fine
9:52
I can re-add that to the eggs once I put them in the jars here. So that's what I'm going to do
9:57
I'm actually not going to use these. I mean, these eggs now are ready to fish. But I'm not going to fish them right away
10:02
I'm actually going to put them right into my mason jars here. And I'm just going to show you how I do it with my FoodSaver
10:09
And with my, well, it's like a jar, kind of a lid sealer thing
10:15
So, okay. So we're going to do that. So here we go
10:19
Let's have a look at these, the natural eggs. So this was the typical 3-2-1
10:25
These don't look as good. And to be honest with you, if you remember from the beginning of the video
10:29
this was the one that the skinnet didn't look the greatest. There was a little blood in it
10:34
And it wasn't great. But anyway, you can see these are a little soupy, a little soft
10:39
I probably would say these aren't great to take to the river right now. Because they're, it's hard to tell without actually looking at them
10:46
But they're a little soft. So what I would do with these ones is, I would throw some dry borax on this for about a day before I was going to go fishing
10:54
So if I was going to fish these tomorrow, I would put them in my bag or whatever bag I'm going to take them to the river
10:59
And I would throw some borax on it. And that'll help tighten up and suck out some of that moisture
11:04
But to freeze it like that, totally fine. I'm just going to put that in there
11:10
Yeah, I mean, that's kind of basically the finished product there. Okay, let's see how the, so this was the borax
11:18
the colored borax that I used. So this was the red rocket
11:22
So I didn't have to add any coloring. The exact same recipe as that, but instead of just using plain borax like I did there
11:29
I used the Pro-Cure Red Rocket Borax. And so it just adds that color
11:36
You can feel the eggs feels, actually the eggs feel really good on this one. Yeah, really pliable
11:42
Oh, really? I actually really like this final product. That's nice. It still is a little loose
11:49
Actually, that's really nice. I probably wouldn't even add borax to that
11:53
That's nice. That feels really good. Okay, I'm going to take these gloves off
11:59
And I'm going to begin vacuum sealing. So the eggs are in there. I haven't touched the eggs ever with my hands
12:03
I've always only touched them with these gloves, which is a great thing because you don't want to be transferring any scent
12:09
Now, one thing to think about too is before you actually vacuum seal this up
12:13
we could add extra oils or scents in there too. So if you had some pure anise oil, this is actually what I would do
12:19
I would just drop it in right now. A couple drops, a couple drops, a couple drops. And then seal it away
12:24
So, just something to think about if you ever wanted, or whatever the scent or oil you want to use
12:29
Those. Those ones. Take this. I'm just going to take the rim
12:40
place it on the mason jar like so. So this is just a typical food saver
12:47
I think this is the model 20V2040. It's a little bit older one
12:51
But this is an additional accessory I bought on Amazon. It was like $12 or something, $10, $12
12:58
And it allows you to go in there and suction that up. So let's do this
13:02
So, like so. Turn that. And then you're going to turn this thing in there so it's nice and tight
13:11
So, just kind of turn it. And then, this is on there sealed on there really good
13:17
And then, I'm just going to pop this. It just goes right on to a normal size mason jar
13:25
And then, on this particular case, I'm going to click the canister button
13:31
There is, in some of the newer models, I think they only have one button. But for this case, we're going to do that
13:38
Just going to push and go. I need to just pull this thing off
13:51
Yeah, that was all I did. This pops right off. There we go
14:02
So now you don't get that little snapping thing. So the lid is sealed
14:06
Then, seal that. Good to go. But those eggs, because this cure has so much sugar in it
14:14
these eggs actually will be very difficult to burn. The amount of sugar, sorry, and salt
14:20
I'm not worried about these fridges burning. Okay, one down, two more to go
14:32
Test it to make sure it's sealed. Not sealed. That means it's sealed
14:41
One thing I'm missing here now, I have to label them. So what I'll do is I'll usually put on a piece of tape
14:45
Something like that. Get a marker. And I'll go
14:57
2-1 And that's for original. Just a straight up 3-2-1 3-2-1
15:09
Red Rocket Oh yeah, the date. Of course, silly. So then I'm also going to put the date
15:18
Today is what? January 19 Into the freezer they go. You can see there's some old chum eggs I've got there
15:30
That are coated in some borax. I might even actually put some of these down here
15:34
These are old. It's more like sturgeon bait now. So, they're ready for the freezer
15:40
These guys will be good in here for about a year. I usually use them within a year
15:45
They go sometimes longer. That's kind of the deal. Alright. Thanks so much for watching
15:53
Really appreciate it. If you enjoyed this video, give it a thumbs up
15:57
If you'd like to see more videos like this, let me know in the comments. I'd really like hearing from you
16:01
If you have a special recipe that you'd really like to share. Or you'd like me to try out
16:05
By all means, again, drop a comment. I hope this was helpful for you
16:09
Thanks so much for watching. If you made it this far, cheers
16:15
My furnace just turned on. I'm in the furnace room. One second
16:21
I'm going to turn the furnace off. It turned off by itself
16:25
And I didn't even turn it off. That was weird. It's probably going to turn back on anyway
16:31
So, that's all I got. Oh, there's the furnace again. I'm going to turn it off
16:37
I'm going to turn it off. I'm going to turn it off
16:41
I'm going to turn it off. There's the furnace again. By the way, this is my furnace room
16:47
That's my furnace room. Furnace slash... Fishing area
#Cooking & Recipes
#Food
#Water Activities